A custom application called the prototype application is available from the SIMULIA Learning Community. The prototype application allows you to experiment with the contents of your dialog box until you produce a design that is satisfactory. You can start the prototype application, make changes to the code that controls the contents of the dialog box, and instantly see those changes reflected in the application.
The SIMULIA Learning Community provides examples of plug-ins and customized applications as well as access to a community of users that fosters the advance of the Abaqus Scripting Interface and the Abaqus GUI Toolkit. Search in this community for “Prototype Example” to download the zip file for the prototype application, then unzip the files and go to the directory containing the files that you downloaded. To use the prototype application, open the file testDB.py in a text editor. From the system prompt, enter the following:
abaqus cae -custom prototypeApp -noStartupThe -custom parameter indicates that you are executing an application that is a customized version of Abaqus/CAE. The -noStartup parameter indicates that you want to start Abaqus/CAE without displaying the startup screen. For more information, see “Abaqus/CAE execution,” Section 3.2.7 of the Abaqus Analysis User's Guide.
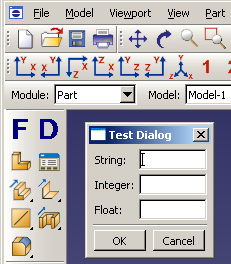
The application creates two icons in the toolbox, as shown in Figure 2–2.
TheFor example, try the following:
Click the ![]() icon to post the dialog box and note the text labels shown in the dialog box.
icon to post the dialog box and note the text labels shown in the dialog box.
Click Cancel in the dialog box to unpost it.
Change one of the labels in testDB.py and save the file.
Click the ![]() icon to post the dialog box again. You will see the modified label in the dialog box.
icon to post the dialog box again. You will see the modified label in the dialog box.
When you click OK in the dialog box, the kernel command issued by the dialog box is written to the message area, rather than being executed by Abaqus/CAE. This allows you to debug the command before you try to execute it in the kernel.
After you have debugged your form and dialog box code, you can modify the form to issue the command to the kernel by following the example in “Form example,” Section 7.3.1. You can connect the form to your GUI, instead of to the ![]() icon, by following the example shown in “GUI module example,” Section 8.2.
icon, by following the example shown in “GUI module example,” Section 8.2.